

Table of Contents
- Why Strip Paint From Fire Helmets
- Safety Warnings and Chemical Stripper Hazards
- Tools and Materials You'll Need
- Fire Helmet Restoration Techniques: Choosing Your Stripping Method
- Surface Preparation and Cleaning for Paint Adhesion
- NFPA 1851 Helmet Maintenance and Structural Integrity Testing
- Fire Helmet Brass Front Holder Replacement and Refinishing
- Avoiding Damage to Leather and Fiberglass Helmet Shells
- Frequently Asked Questions
Last Updated: September 25, 2026
Why Strip Paint From Fire Helmets
Fire helmets accumulate paint and weathering that compromise appearance and structural integrity. Knowing how to strip paint from fire helmets safely is essential for restoring gear to working condition and meeting NFPA standards.
Many firefighters face the challenge of removing old paint without damaging the underlying shell material, fiberglass, thermoplastic, or composite. The methods you choose determine whether your restoration succeeds or causes permanent damage.
Safety Warnings and Chemical Stripper Hazards
Chemical strippers contain harsh solvents that pose serious health hazards without proper safety precautions.
Common chemical stripper dangers:
- Respiratory damage: Fumes from lacquer thinner and solvent-based strippers can harm your lungs (the CDC). Always use a respirator rated for organic vapors.
- Skin burns: These chemicals cause chemical burns on contact. Nitrile gloves alone won't protect you, use heavy-duty chemical-resistant gloves.
- Eye damage: Splashes cause permanent vision loss. Safety glasses are non-negotiable.
- Fire hazard: Many strippers are flammable. Keep them away from heat sources and open flames.
Citrus-based strippers are gentler but work more slowly, requiring longer dwell times.
Wear a respirator, chemical-resistant gloves, eye protection, and long sleeves. If pregnant, have respiratory conditions, or are chemical-sensitive, use mechanical methods instead.
Tools and Materials You'll Need
Essential safety gear:
- Respirator (rated for organic vapors if using solvent-based strippers)
- Chemical-resistant gloves (nitrile won't cut it)
- Safety glasses or face shield
- Long sleeves and pants
- Apron or protective clothing
Stripping tools:
- Paint stripper (chemical, citrus-based, or mechanical)
- Plastic scraper or putty knife
- Wire brush (brass or steel, depending on helmet material)
- Drill with wire wheel attachment
- Sandpaper (80-grit, 120-grit, 220-grit)
- Sanding block or orbital sander
Cleaning supplies:
- Mild soap and lukewarm water
- Clean rags or paper towels
- Degreasing cleaner
- Bucket for rinsing
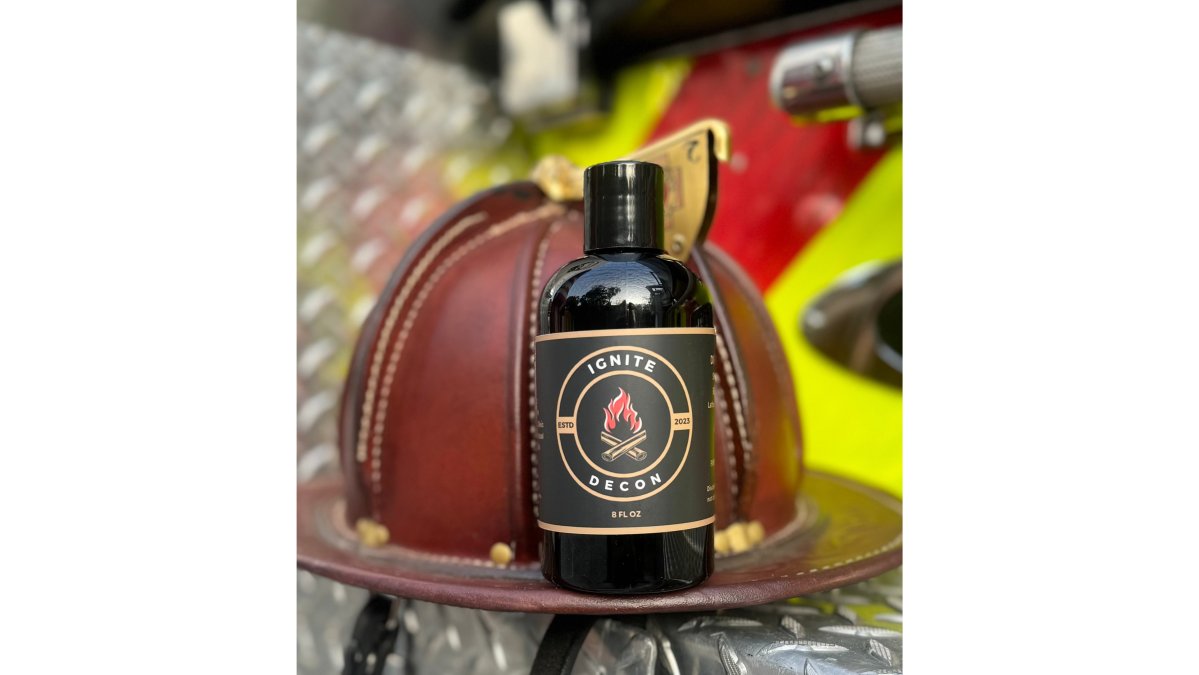
- All In One Liquid Decon Soap from EH Coverings removes carcinogens and toxins after a fire with our Decon Soap. You will get a deep clean and eliminate stubborn smoke smell.
Optional but helpful:

- Drop cloth or plastic sheeting
- Rubber boots
- Work gloves for handling
- Ventilation fan
Fire Helmet Restoration Techniques: Choosing Your Stripping Method
How to strip paint from fire helmets depends on helmet material and available time. Three main approaches exist: chemical stripping, abrasive sanding, and mechanical removal.
Chemical Strippers for Composite and Thermoplastic Helmets
Chemical strippers work fastest on composite and thermoplastic helmets. They dissolve paint bonds, making removal easier than sanding alone.
Apply stripper generously and let sit per label instructions (typically 15-30 minutes). The paint will bubble and soften. Use a plastic scraper to lift loosened paint. Solvent-based strippers work fastest but are harshest; citrus-based are safer but slower; lacquer thinner is quick but produces strong fumes.
Pros of chemical stripping:
- Fastest method overall
- Works on all helmet materials when chosen correctly
- Requires minimal physical effort
Cons of chemical stripping:
- Health hazards if safety gear isn't used
- Can damage thermoplastic if left too long
- Requires proper disposal of chemical waste
Sanding and Abrasive Methods
Sanding removes paint through friction. It's safer than chemicals but requires more physical work and produces dust.
Start with 80-grit for heavy removal, progress to 120-grit for medium layers, finish with 220-grit for smoothing. Wet sanding reduces dust and is gentler. An orbital sander speeds flat surfaces; hand sand curved areas for better control.
Pros of sanding:
- No chemical hazards
- Works on all helmet materials
- You control the pace and pressure
Cons of sanding:
All In One Liquid Decon Soap →
- Physically demanding
- Creates dust (wear a dust mask)
- Takes longer than chemical stripping
Mechanical Removal With Drill Attachments
Attach a brass wire brush or steel wire wheel to your drill at low speed. Work in small sections, moving steadily across the surface. Wire wheels work best on fiberglass and composite; use brass brushes on leather to avoid gouging.
Pros of mechanical removal:
- Faster than hand sanding
- No chemicals involved
- Works on most helmet materials
Cons of mechanical removal:
- Risk of gouging if pressure is too high
- Creates dust and debris
- Requires practice to avoid damage
Surface Preparation and Cleaning for Paint Adhesion
After stripping, verify the stripping process didn't compromise structural integrity before preparing for primer.
Immediate Post-Stripping Inspection
Conduct a visual and tactile inspection. Run your fingers across the entire surface feeling for soft spots, cracks, crazing (fine white stress lines), or spongy areas. For fiberglass, look for white stress marks or separating layers. For thermoplastic or composite, check for stress cracks at high-impact zones. For leather, inspect for brittleness or lost elasticity. If observed, stop work immediately, the helmet may no longer meet NFPA 1851 standards and should not return to service without professional assessment.
Chemical Residue Removal
Wash thoroughly with mild soap and lukewarm water, paying special attention to crevices and suspension systems. Degrease with a cleaner rated for paint stripper residue, even small amounts of oil or chemical residue prevent primer adhesion. Allow at least 2 hours drying time in well-ventilated space, or overnight if humid.
Surface Texture and Smoothness Verification
Light sand with 220-grit paper to smooth remaining flecks, then wipe dust with a damp cloth. The shell should feel smooth and slightly rough to aid primer bonding. If too glossy, light sand again. If tacky, powdery, or unstable, the stripping method may have damaged the resin, do not proceed.
NFPA 1851 Compliance Check Before Refinishing
According to NFPA 1851 standards for helmet maintenance and inspection, helmets must be assessed for structural integrity after any maintenance procedure that alters the shell. Paint stripping qualifies as such maintenance.
Perform these checks before applying primer:
- Impact zone integrity: Gently tap the front brim, crown, and sides with a rubber mallet. The sound should be solid and consistent. A dull thud or hollow sound in one area may indicate internal damage or delamination.
- Suspension system function: Ensure the chin strap attachment points are secure and undamaged. The interior padding should be intact and not compressed or deteriorated. If stripping exposed the suspension to harsh chemicals, inspect for brittleness or separation from the shell.
- Shell hardness: Press firmly on the helmet shell with your thumb. It should resist pressure without flexing excessively or feeling soft. Excessive flex or a spongy feel indicates the resin matrix may have been compromised.
- Fit and alignment: Put the helmet on and check that it sits level on your head. The brim should not be warped or twisted. Any misalignment may indicate heat damage or chemical warping during stripping.
If the helmet passes these checks, it is likely safe to refinish and return to service.
Curing and Final Readiness
Allow the helmet to cure fully before returning it to service. If you've used chemical strippers, ensure all fumes have dissipated and the shell has returned to normal hardness. This typically takes 24 to 48 hours in a well-ventilated space. Do not store the helmet in an airtight container or sealed bag during this period, as trapped fumes can continue to soften the material.
NFPA 1851 Helmet Maintenance and Structural Integrity Testing
NFPA 1851 sets the standard for fire helmet maintenance and inspection. After stripping and before refinishing, your helmet must pass basic structural checks.
Fire Helmet Brass Front Holder Replacement and Refinishing
Many helmets feature brass front holders, the decorative front emblem that displays your department or personal insignia.
Avoiding Damage to Leather and Fiberglass Helmet Shells
Test any method on a small area first. The back of the helmet or inside the brim is ideal for testing. This prevents visible damage if something goes wrong.
Frequently Asked Questions
Is it safe to strip paint from a modern composite fire helmet?
Safety depends on the method and helmet material. Modern composite and thermoplastic helmets tolerate citrus-based or mild chemical strippers better than solvent-based lacquer thinners, which can degrade the shell. Always wear a respirator, gloves, and eye protection. Test any stripper on a small, inconspicuous area first. Avoid excessive heat or aggressive sanding that can compromise structural integrity. If you're uncertain about your helmet's material, check the manufacturer's documentation or contact the helmet maker before stripping.
What's the difference between fire helmet restoration techniques for leather versus composite helmets?
For composite helmets, use gentler citrus-based strippers and fine-grit sanding (220-grit or higher) to avoid peeling or structural damage. Always verify your helmet's material before selecting a method. When in doubt, start with the gentler approach and escalate if needed.
What does NFPA 1851 helmet maintenance require after stripping paint?
NFPA 1851 sets standards for helmet inspection and maintenance. After stripping paint, inspect the shell for cracks, delamination, or weakening. Clean thoroughly with mild soap and lukewarm water to remove all chemical residue and dust. Allow complete drying before applying primer or new paint. Test shell integrity by gently flexing the helmet and looking for stress marks. If you notice structural damage, the helmet may no longer meet NFPA 1851 standards and should be retired from service.
How do I know if my fire helmet brass front holder needs replacement after stripping?
Inspect the brass front holder for corrosion, dents, or loose attachment points after stripping. If the holder is pitted, cracked, or no longer grips securely, replacement is necessary to maintain helmet integrity and appearance. EH Coverings offers fire helmet brass front holder replacements designed to fit MSA, E.H. Coverings, Cairns, and Morning Pride helmets without modification. A quality replacement ensures your customized helmet meets professional standards and lasts your entire career.