

Table of Contents
- Fire Helmet Inspection Standards and NFPA Compliance
- Routine Inspection Procedures for Daily Duty
- Creating a Structural Fire Helmet Inspection Checklist
- Understanding Fire Helmet Service Life and Retirement Criteria
- Leather Fire Helmet Maintenance and Inspection
- Post-Incident Inspection Requirements
- DIY vs. Professional Inspection: When to Call in Experts
- Common Inspection Failures and How to Avoid Them
- Frequently Asked Questions
Last Updated: September 22, 2026
Fire Helmet Inspection Standards and NFPA Compliance
Fire helmet inspection standards exist to protect you. The standards come from the National Fire Protection Association (NFPA), which sets the rules for protective equipment in the fire service. Understanding these standards helps firefighters keep their helmets in safe, working condition throughout their careers.
The main standards you need to know are NFPA 1971 for structural firefighting helmets and NFPA 1977 for wildland firefighting helmets. These standards define what makes a helmet safe and when it needs to be retired. They cover everything from the shell integrity to the suspension system to the chinstrap.
Understanding fire helmet inspection standards means knowing what to look for and when to look for it. Routine inspections catch problems early. Post-incident inspections make sure your helmet didn't get damaged in the field. Proper maintenance extends the life of your gear.
Routine Inspection Procedures for Daily Duty
Daily inspections are your first line of defense. You should check your helmet every time you put it on. This takes less than a minute but catches most damage before it becomes dangerous.
Start with a visual scan of the entire helmet. Look for cracks, dents, or discoloration. Check the shell for any signs of heat exposure or impact damage. Run your hands over the surface to feel for soft spots or areas where the shell has lost its rigidity.
Shell and Brim Integrity Checks
The shell is the hard outer part of your helmet. It protects your head from impact and heat. Cracks in the shell mean the helmet has lost some of its protective ability and should be retired.
Look for visible cracks, splits, or crazing on the shell surface. Crazing looks like a network of small cracks. It happens when the shell material starts to degrade from heat or UV exposure. If you see crazing, the helmet is reaching the end of its service life.
Check the brim for cracks and separation from the shell. The brim takes a lot of impact and heat. If it's separating or cracked, the helmet needs professional assessment or retirement.
Press on the shell with your thumb. A good helmet shell should feel hard and rigid. If any area feels soft or gives under pressure, the material has degraded and the helmet should be retired.
Suspension System Inspection
The suspension system is what holds your head inside the helmet. It absorbs impact and distributes the force across your head. A damaged suspension system means the helmet won't protect you properly.
Check all four suspension tabs where they attach to the shell. Look for cracks in the tabs or loose rivets. The rivets hold the tabs in place. If they're loose or missing, the suspension won't stay secure.

Feel the suspension straps. They should be flexible but not brittle. Brittle straps can snap when you need them most. If the straps feel hard and cracked, they need to be replaced. EH Coverings offers suspension tabs that fit most industry-standard helmets, making replacement straightforward.
Inspect the sweatband. It sits against your forehead and absorbs sweat. A deteriorated sweatband won't absorb moisture and can cause discomfort. If it's cracked, torn, or peeling, consider replacing it.
Chinstrap and Hardware Functionality
The chinstrap keeps your helmet on your head during intense activity. It needs to be secure but not so tight that it cuts off circulation.
Test the chinstrap attachment points. They should be tight and not move when you tug on the strap. Loose attachment points mean the chinstrap could come off during use.
Check the chin cup for cracks or deterioration. The chin cup sits under your chin and distributes the pressure of the strap. If it's cracked or hard, it needs replacement.
Inspect all hardware including rivets, snaps, and clips. Brass hardware resists corrosion and lasts longer than other materials. Look for corrosion, rust, or loose connections. Corroded hardware should be replaced before it fails.
Test the chinstrap adjustment. It should tighten and loosen smoothly without snagging. If the strap is frayed or torn, it needs repair or replacement.
Creating a Structural Fire Helmet Inspection Checklist
A written checklist ensures you don't miss anything during inspection. The checklist becomes a record of what you checked and when.
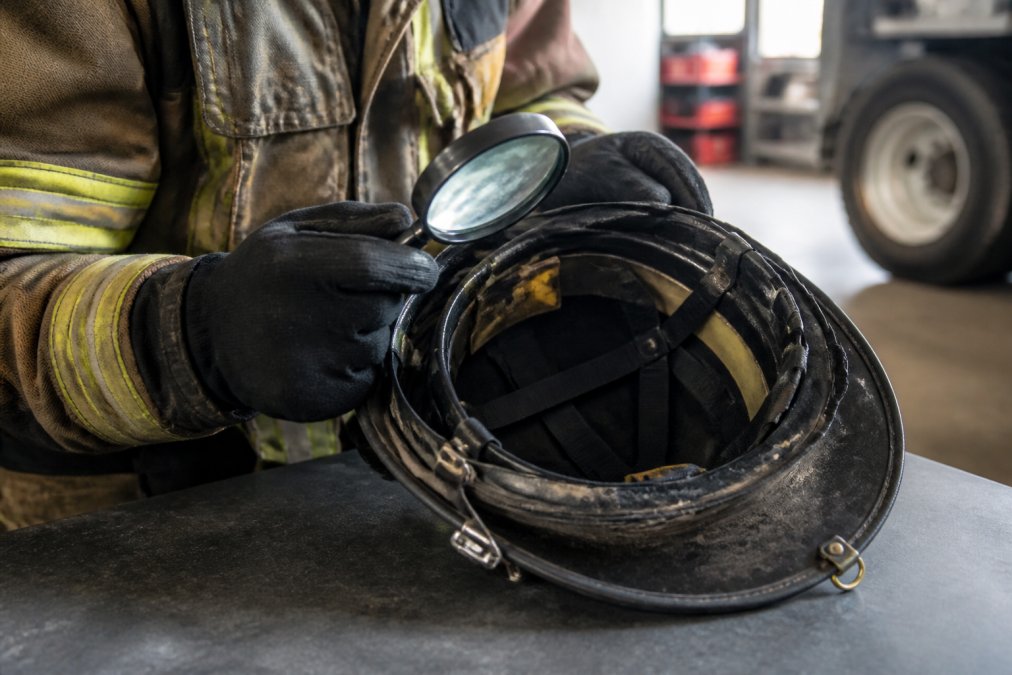
Your checklist should include these items:
- Shell surface: cracks, crazing, soft spots, discoloration
- Brim: cracks, separation from shell, impact damage
- Suspension tabs: cracks, loose rivets, deterioration
- Suspension straps: brittleness, cracks, elasticity
- Sweatband: tears, peeling, deterioration
- Chinstrap: fraying, tears, proper function
- Hardware: corrosion, loose connections, missing pieces
- Ear covers: cracks, separation, deterioration
- Retroreflective trim: fading, separation, visibility
- Overall function: helmet sits properly, no movement, secure fit
Check off each item as you inspect it. Note any damage you find. If you find damage, document it and report it to your supervisor. This creates a maintenance record that helps track the helmet's service life.
Carved Front Holders for Service →
Digital inspection checklists work well for departments with computer access. They can be stored in the cloud and accessed from anywhere. Paper checklists work just as well if that's what your department uses. The key is consistency and documentation.
Understanding Fire Helmet Service Life and Retirement Criteria
Every helmet has a service life. After that period, it must be retired regardless of condition. NFPA standards define when helmets reach the end of their service life.
Most structural firefighting helmets last between 5 and 10 years from the date of manufacture. The exact timeline depends on the material, the amount of use, and the environmental conditions. Helmets exposed to extreme heat or UV damage age faster than helmets in mild climates.
Retire a helmet immediately if:
- The shell has visible cracks or crazing
- The suspension system is damaged or deteriorated
- The chinstrap cannot be secured properly
- Hardware is corroded or missing
- The helmet no longer fits securely on your head
- It has been involved in a significant impact or fire
Even if none of these apply, retire the helmet when it reaches its maximum service life. Using an expired helmet puts you at risk. The materials have degraded beyond what visual inspection can detect.
Keep the manufacture date somewhere on your helmet so you know when it was made. This helps you track when retirement is required. Some departments stamp the date on the inside of the helmet.
Leather Fire Helmet Maintenance and Inspection
Leather helmets require different care than composite helmets. Leather is a natural material that responds to moisture, temperature, and UV exposure.
Inspect leather for cracks, peeling, or hardening. Leather should remain supple and flexible. If it becomes hard and brittle, it's degrading and losing its protective properties.
Check for mold or mildew growth. Leather can develop these if stored in damp conditions. If you see growth, clean the helmet with a dry cloth and store it in a dry location.
Leather helmets need conditioning to maintain flexibility. Use a leather conditioner designed for protective equipment. Apply it every few months to keep the leather supple. This extends the service life of leather components like ear covers and the sweatband.
Avoid exposing leather to direct sunlight for long periods. UV exposure causes fading and deterioration. Store leather helmets in a cool, dry place away from windows.
If leather components are cracked or peeling, they can be replaced. EH Coverings specializes in custom leather helmet accessories. Replacement is often more cost-effective than retiring the entire helmet.
Post-Incident Inspection Requirements
After every significant incident, your helmet needs a thorough inspection. Even if the helmet looks fine, internal damage might have occurred.
Look for any visible signs of impact, heat exposure, or chemical exposure. Check the shell for new cracks or soft spots.
DIY vs. Professional Inspection: When to Call in Experts
Most routine inspections you can do yourself. You know your helmet better than anyone. You can spot obvious damage and track changes over time.
Common Inspection Failures and How to Avoid Them
Most inspection failures happen because inspectors miss subtle signs of damage. Knowing what to look for helps you avoid these mistakes.
Frequently Asked Questions
What are the NFPA standards for fire helmet inspection?
NFPA 1851 and NFPA 1971 establish the primary standards for fire helmet protective ensembles. NFPA 1851 covers structural firefighting protective ensembles, while NFPA 1977 addresses wildland firefighting helmets. These standards mandate routine inspections after each use, advanced inspections annually, and destructive testing at specific intervals. Compliance ensures your helmet meets impact resistance, thermal degradation protection, and structural integrity requirements essential for occupational safety.
How often should fire helmets be inspected according to fire helmet service life guidelines?
Routine inspections should occur after every incident and at least monthly during regular duty. Advanced inspections must happen annually. The service life of a structural firefighting helmet typically spans 10 years from the date of manufacture, though leather components may require retirement sooner depending on heat exposure and ultraviolet damage. Track inspection dates and any damage signs to determine when retirement becomes necessary.
What are signs of damage that require a helmet to be taken out of service?
Remove a helmet from service immediately if you find cracking in the shell, delamination of composite materials, hardware corrosion that prevents proper fit, suspension system failure, chinstrap damage, or retroreflective trim degradation. Thermal degradation from intense heat exposure also signals retirement. Any structural compromise affecting head protection or the ability to secure the helmet safely requires decommissioning.
Are there specific inspection requirements for leather fire helmets?
Leather fire helmet maintenance requires checking for cracking, delamination, and heat damage more frequently than composite helmets. Leather degrades faster under ultraviolet exposure and heat. Inspect the leather covering for separation from the shell, brittleness, or color changes indicating thermal damage. Clean leather regularly and store in cool, dry conditions. Leather components typically require earlier retirement than the helmet's overall service life.