

Table of Contents
- How Custom Leather Accessories Fit Cairns Helmets
- Custom Leather Fire Helmet Parts: What's Available
- Handmade vs. Mass-Produced: Why Material Quality Matters
- Fire Helmet Customization Safety Standards You Need to Know
- How to Install a Leather Helmet Front on a Cairns
- Personalization Options: Engraving, Patches, and Bespoke Design
- Care and Maintenance of Leather Firefighter Gear
- Conclusion
Last Updated: August 26, 2026
How Custom Leather Accessories Fit Cairns Helmets
Custom leather accessories are purpose-built helmet components designed to mount directly onto traditional fire helmets. Whether they fit your Cairns depends on the model you're running and the attachment system the maker uses. Most quality leather fronts, shields, and accountability patches will fit a Cairns helmet with the right hardware and a few minutes of prep work.
However, "fits most helmets" is not the same as "fits every model without adjustment." Cairns produces several distinct helmet lines with dimensional differences that affect how a leather front sits, how rivets seat, and whether brim geometry causes clearance problems.
Cairns Model Specifications That Affect Fitment
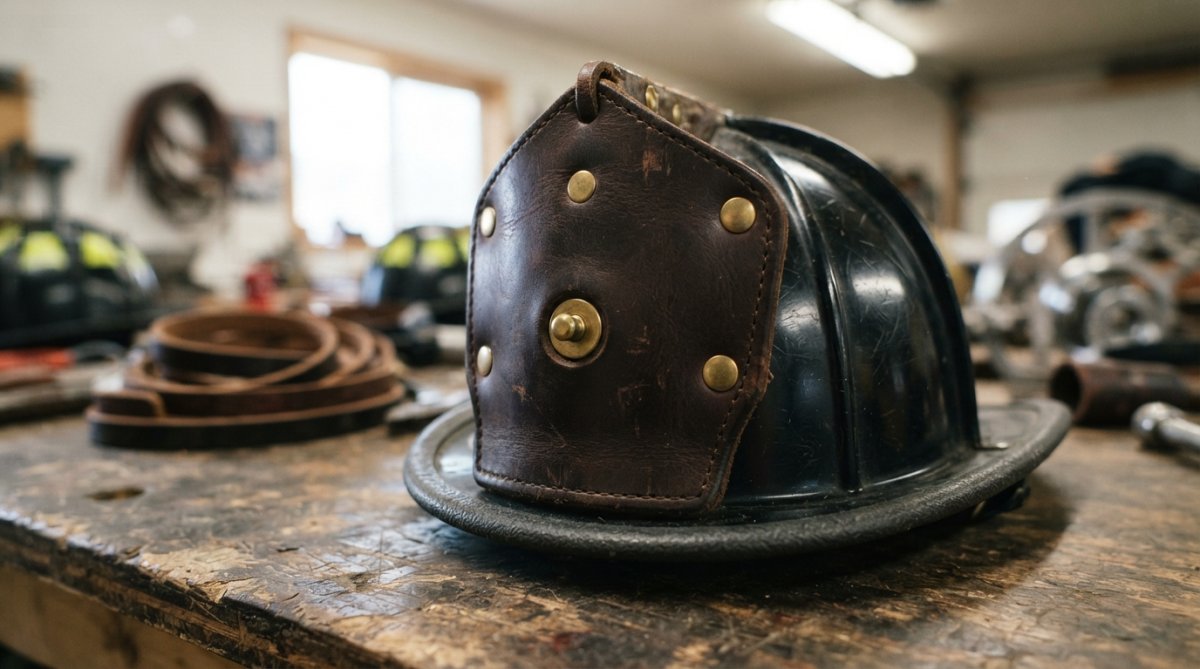
The Cairns 1010 and 1044 are the most common models in the field. Both use a traditional American-style brim profile with consistent front-face geometry, which is why many custom leather accessories are engineered specifically around these two models. The 1010 runs a slightly shallower crown than the 1044, which can affect how a leather front holder sits at the lower attachment points.
The Cairns 660 Metro and N5A New Yorker use a different brim angle and narrower front face. Leather accessories designed for the 1010/1044 profile may require minor trimming on the 660. Always confirm your model before ordering.
Key dimensions to check:
- Front face width at the widest point
- Distance between upper and lower mounting holes
- Brim angle relative to the helmet shell
- Crown height and front panel clearance
Universal Fitment vs. Model-Specific Parts
Universal fitment is a legitimate category. Many leather fronts are designed with slightly oversized panels and pre-punched hole patterns that accommodate the 1010, 1044, and Morning Pride Ben 2 geometry simultaneously. The DCFD All American Brass from EH Coverings is specifically designed to fit MSA and E.H. Coverings style helmets as well as the Cairns 1010 and 1044, verified cross-compatibility separates well-engineered parts from generic ones.

Model-specific parts are cut and pre-drilled to exact tolerances for one helmet line. They install faster and require zero adjustment. If you know your model and want a zero-fuss install, model-specific is the right choice.
| Fitment Type | Best For | Adjustment Needed | Models Covered |
|---|---|---|---|
| Universal | Multiple helmet models | Minor hole alignment | 1010, 1044, Ben 2, MSA |
| Model-specific | Single known helmet | None | One model only |
| Custom bespoke | Rare or vintage helmets | Minimal | Specified at order |
Custom Leather Fire Helmet Parts: What's Available
The range of custom leather fire helmet parts available today goes well beyond the basic leather front. A fully outfitted helmet can carry a leather front holder, shield, accountability patches, headgear wrap, and padded leather trim, each serving a distinct functional or identification purpose.
Leather Fronts, Shields, and Accountability Patches
The leather front is the centerpiece of any traditional helmet build. It carries rank insignia, department identification, or custom design, and mounts to the front face using rivets or screws through pre-drilled attachment points. Quality leather fronts use bridle leather or tooling leather, dense, vegetable-tanned hides that hold shape under heat and moisture without delaminating.
Shields attach above or behind the front holder and provide additional identification space. Accountability patches are smaller leather tabs, typically rivet-mounted to the side or rear, used for personnel tracking systems.
Genuine leather, specifically vegetable-tanned bridle leather, outperforms bonded or vegan leather alternatives in heat resistance and long-term shape retention. Vegan leather options exist for specific procurement requirements, but for daily duty use in high-heat environments, genuine leather is the standard.
Hardware: Rivets, Buckles, and Attachment Points
Hardware is where many custom leather accessories fail. A leather front is only as secure as its mounting system. Cheap hardware corrodes, loosens, and eventually fails under the thermal cycling of active firefighting.
Solid brass rivets are the traditional standard. They don't corrode, work-harden under the setting process for a permanent grip, and maintain professional appearance through years of service. YKK hardware appears on some strap-mounted accessories and is recognized for consistent dimensional tolerances. Buckles on harness leather straps should be solid brass or solid nickel; plated steel will pit and seize within a season of heavy use.
EH Coverings includes three rivets with each front holder, pre-matched to the mounting pattern. The hardware and leather are engineered as a system, not assembled from whatever was on the shelf.
Handmade vs. Mass-Produced: Why Material Quality Matters
The difference between handmade and mass-produced leather accessories is structural, not merely aesthetic.
Mass-produced leather fronts are typically cut from split leather or bonded leather composites, stamped rather than hand-tooled, and assembled with automated riveting that doesn't account for hide variation. Under repeated thermal exposure, moisture, and mechanical stress, they delaminate at the edges and crack at rivet holes.
Handmade leather accessories, cut from full-grain or top-grain bridle leather and set by hand, behave differently. Leather fibers run consistently through the panel. Rivet holes are punched cleanly without tearing surrounding hide. Hardware is set with controlled force that locks without splitting.
American-made production adds accountability. Domestic manufacturing means leather sourcing, cutting, and assembly are subject to domestic quality oversight, and the maker is reachable when you have fitment questions or warranty concerns.
National Fire Protection Association standards for protective equipment
Fire Helmet Customization Safety Standards You Need to Know
Fire helmet customization safety standards are governed primarily by NFPA 1971, the standard on protective ensembles for structural fire fighting and proximity fire fighting. Any modification to a certified helmet, including the addition of leather accessories, must not compromise the helmet's structural integrity, thermal protection, or impact resistance as tested to that standard.
Leather fronts and accountability patches that mount externally to the helmet shell using the manufacturer's designated attachment points are generally considered non-structural modifications. They don't penetrate the shell in ways that compromise impact protection, and they don't add enough thermal mass to affect heat transfer meaningfully.
What crosses a line: drilling new holes outside the manufacturer's specified attachment zones, applying adhesives that degrade the shell material, or adding accessories that obstruct the brim's protective geometry. As noted in NFPA 1971 standard on structural firefighting protective ensembles, modifications that alter the tested configuration of a certified helmet can void the certification.
Check with your department's safety officer before any modification. A professionally finished leather front from a reputable maker will typically pass inspection without issue.
How to Install a Leather Helmet Front on a Cairns
Installing a leather helmet front on a Cairns is straightforward and takes most firefighters under thirty minutes with basic tools. The most common mistake is rushing the alignment step, a front holder set even two millimeters off-center is visible from across the apparatus bay.
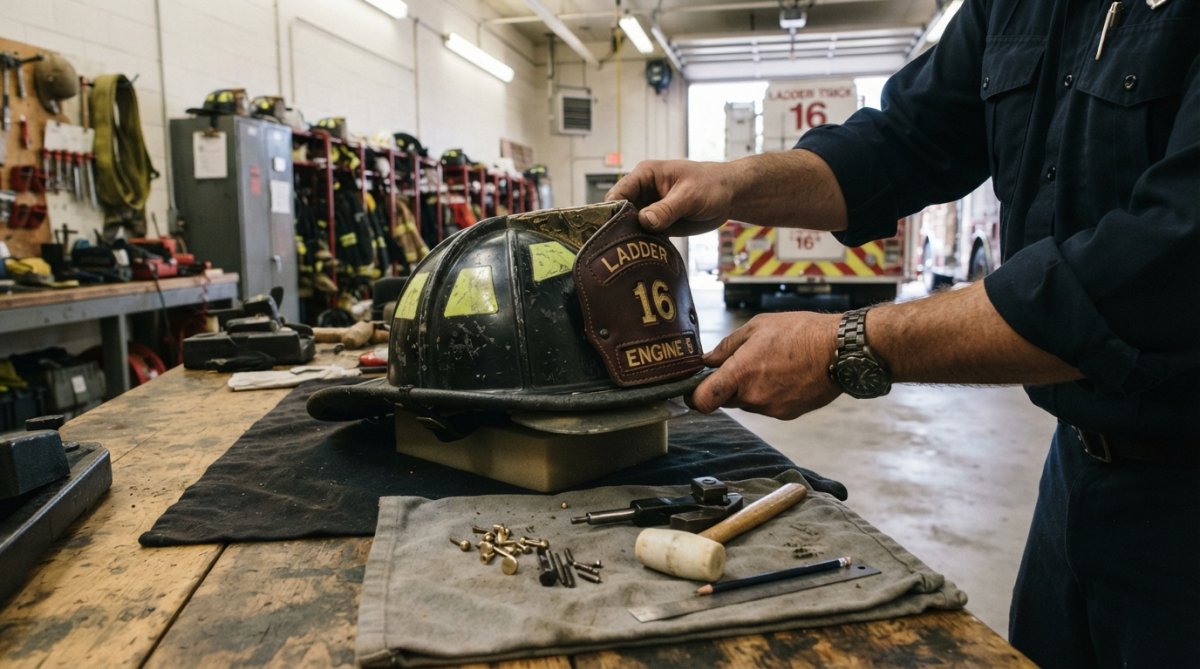
Tools and Prep Work Before You Start
Gather these before you touch the helmet:
- Rivet setting tool matched to your rivet diameter
- Center punch or awl
- Drill with a bit sized to your rivet shank
- Masking tape
- Ruler or calipers
- Soft cloth or padding for the work surface
Clean the front face of the helmet shell with a damp cloth and let it dry completely. Any grit under the leather panel creates a pressure point that accelerates wear at rivet holes. Lay the helmet on a padded surface, crown down, so the front face is stable and accessible.
Step-by-Step Mounting with Rivets
-
Position the front holder dry. Place the leather front against the helmet face without hardware. Center it visually, then use calipers to confirm equal spacing from both edges. Mark hole positions with a pencil through the pre-punched holes in the leather.
-
Apply masking tape over your marks. This prevents the drill bit from skating on the helmet shell surface.
-
Drill the attachment holes. Use the drill bit sized to your rivet shank, typically 3/16 inch for standard brass rivets. Drill straight through the shell at each marked point and clear any swarf from inside the helmet.
-
Seat the front holder. Pass each rivet through the leather panel and into the helmet shell. From inside the helmet, place the rivet cap over the shank.
-
Set the rivets. Use the rivet setting tool to peen the shank over the cap. Work each rivet to the same pressure for even stress distribution on the leather.
-
Inspect the finished mount. The leather panel should sit flush against the helmet face with no gaps at the edges. Tug the front holder firmly in all directions, there should be zero movement.
According to OSHA guidelines on personal protective equipment inspection and maintenance, PPE modifications should be documented and inspected after any alteration.
Personalization Options: Engraving, Patches, and Bespoke Design
Personalization shifts custom leather accessories from functional gear to career-defining equipment. Options available from quality makers cover everything from hand-stamped department insignia to fully bespoke designs built around a specific rank or assignment.
Engraving on leather is typically done by hand-tooling or laser cutting. Hand-tooled engraving produces a dimensional result that develops patina over time. Laser engraving produces a cleaner, more precise line, which suits department seals and text-heavy designs.
Accountability patches can be personalized with name, badge number, or unit designation. Many departments are moving toward standardized patch formats that integrate with personnel accountability systems while maintaining traditional aesthetic.
Bespoke design means working directly with the maker to produce a front that exists nowhere else. The Customizable All American Brass from EH Coverings at $75.00 is built for this use case, available in brass, matte black, or gloss black, with the front holder reworked and strengthened beyond the previous design.

Care and Maintenance of Leather Firefighter Gear
Leather firefighter gear lasts a career when maintained correctly and fails prematurely when neglected.
After each use: Wipe the leather surface with a clean, dry cloth to remove soot, moisture, and debris. Don't let contamination sit, smoke residue is mildly acidic and degrades vegetable-tanned leather over time.
Monthly conditioning: Apply a leather conditioner appropriate for bridle or tooling leather. Work it in with a soft cloth using circular strokes, then buff off excess. Conditioned leather stays supple and resists cracking at stress points like rivet holes.
Hardware inspection: Check rivets for looseness every three to six months. A loose rivet needs to be re-set or replaced before it allows the front holder to shift under load.
Storage: Store leather accessories away from direct sunlight and heat sources when the helmet is not in use. UV exposure bleaches and dries leather faster than almost any other environmental factor.
Make hardware checks part of your regular gear inspection. For departments that require documented gear inspections, as outlined in NFPA 1851 standard on selection, care, and maintenance of protective ensembles, leather accessories should be included in the routine inspection log.
| Maintenance Task | Frequency | What to Check |
|---|---|---|
| Surface wipe-down | After each use | Soot, moisture, debris |
| Leather conditioning | Monthly | Suppleness, cracking at edges |
| Rivet inspection | Every 3-6 months | Tightness, corrosion |
| Hardware check | Every 3-6 months | Buckle integrity, strap wear |
| Full gear inspection | Annually | All of the above, documented |
Fitment questions, compatibility concerns, and custom order inquiries are part of the process, not an obstacle to it. EH Coverings builds brass front holders and custom leather helmet accessories specifically for the fire service, using American materials and American workers. The Black All American Brass starts at $65.00 and includes three rivets for a complete mount. The DCFD All American Brass at $50.00 is verified to fit the Cairns 1010 and 1044 out of the box. Add to cart and get gear that's built to outlast the job.

Frequently Asked Questions
Are all leather fire helmet accessories universal?
No. Most custom leather accessories are designed for specific helmet families. A leather front built for MSA or EH Coverings-style helmets will often fit Cairns 1010 and 1044 models as well, but you should always verify the product listing against your exact model number. Hardware placement, shell curvature, and mounting hole spacing vary enough between models that an unverified fit can leave gaps or require modification. Always check compatibility before ordering.
How do I measure my Cairns helmet for custom leather fronts?
Measure the width of the front shield mounting area across the brim, then note your exact model number, typically stamped inside the shell. For Cairns 1010 and 1044 helmets, front holders designed for MSA and EH Coverings-style shells are generally compatible without modification. If you are unsure, contact the manufacturer directly with your model number before placing a custom order. Getting the model right upfront avoids the hassle of returns.
Can custom leather accessories affect the safety rating of my helmet?
Accessories that attach to the exterior shell, such as leather fronts, front holders, and accountability patches mounted with rivets, do not alter the helmet's structural integrity when installed correctly. However, any modification that penetrates the shell or affects the suspension harness could impact NFPA 1971 compliance. Always confirm with your department's safety officer before adding any hardware. Decorative leather accessories mounted per manufacturer instructions typically pass department inspection without issue.
What should I look for when buying custom leather gear for fire helmets?
Prioritize genuine leather grade, bridle leather and tooling leather both offer durability, but padded leather options add comfort for headgear wraps. Check that hardware is brass or similarly corrosion-resistant, and confirm rivet count and size match your helmet's mounting points. American-made construction generally signals tighter quality control and faster lead times for custom orders. Verify compatibility with your specific helmet model before completing the purchase.
This article was written using GrandRanker