

Table of Contents
- Understanding Your Helmet and Shield Compatibility
- Fire Helmet Shield Hardware Selection and Preparation
- Measuring and Marking Mounting Points
- Fire Helmet Shield Installation: Step-by-Step Process
- Fire Helmet Shield Fitment Verification and Adjustment
- Common Mistakes to Avoid During Installation
- Safety Inspection and Maintenance After Installation
- Frequently Asked Questions
Last Updated: October 6, 2026
Understanding Your Helmet and Shield Compatibility
Before you attach custom leather shield to your helmet, verify that both pieces are designed to work together. Compatibility issues cause most installation failures. A shield that doesn't fit your specific helmet model will never align properly, no matter how carefully you work.
Checking manufacturer guidance for your helmet model
Your helmet manufacturer provides critical information about where shields mount and what fasteners are safe to use. Different helmet models have different screw hole locations and depths.
Contact your helmet's maker or check the documentation that came with it. Ask specifically about:
- Screw hole locations on the front
- Recommended fastener types and sizes
- Whether the manufacturer allows shield modifications
- Any weight limits for front-mounted accessories
This step protects both your equipment and your safety. Some departments have strict rules about helmet modifications. Verify that adding a shield won't violate your department's equipment standards before you proceed.
Verifying your custom leather shield specifications
Your custom leather shield must be designed for your specific helmet model. If your shield came from another source, confirm the helmet compatibility before starting.
Check that your shield has:
- Pre-drilled or marked holes for fasteners
- The correct overall dimensions for your helmet front
- Proper leather thickness
- A smooth flesh side backing (the back of the shield that contacts the helmet)
Measure your shield against your helmet. The shield should sit centered on the helmet front without overlapping edges or gaps. If something looks off, contact the shield maker before installing.
Fire Helmet Shield Hardware Selection and Preparation
The fasteners you choose determine whether your shield stays secure through years of duty or fails under stress. Poor hardware choice is a common and costly mistake.
Choosing the right fasteners and rivets
Brass hardware resists corrosion better than steel and looks professional on fire helmets. EH Coverings offers Brass Hardware in sets of 5 rivets for front holder and crown work.

Most leather shields attach with:
- Brass rivets (most durable for permanent attachment)
- Stainless steel screws (allow removal and adjustment)
- Helmet-specific fasteners (follow your helmet maker's recommendations)
Never use cheap fasteners. Corrosion weakens the bond and can stain your leather shield.
Count the mounting points on your helmet. Most helmets have 4-6 screw holes on the front. Your shield should align with at least 4 of these points.
Gathering your tools and materials
You'll need specific tools to attach your shield properly. Rushing this step or using wrong tools leads to damaged leather or misaligned holes.
Essential tools:
- Diamond awl or punch (for marking hole locations)
- Drill or rivet gun (depending on your fastener choice)
- Measuring tape (for accurate placement)
- Marker or pencil (for marking drill points)
- Screwdriver or wrench (to match your fastener type)
- Work surface (sturdy table or vise to hold the helmet)
Optional but helpful:
- Leather conditioner (for finishing)
- Masking tape (to prevent marker smudges)
- Small level (to verify alignment)
Gather everything before you start. Stopping mid-installation to find a tool breaks your focus and increases mistakes.
Measuring and Marking Mounting Points
Accuracy here prevents the shield from sitting crooked or loose. Measure twice, mark once, drill once.
Locating helmet screw holes accurately
Place your helmet on a stable work surface. Look at the front of the helmet where the shield will sit.
Use a measuring tape to find the distance between holes:
- Measure from the left edge of the helmet to the first hole
- Record the distance between each hole
- Note the distance from the top of the helmet to the highest hole
Write these measurements down. You'll transfer them to your leather shield next.
If your helmet has a visor or brim, account for its thickness. The shield sits on top of the helmet face, not behind the visor.
Transferring measurements to your leather shield
Place your shield on a clean, flat surface. Position it the way it will sit on the helmet (face up, showing the design side).
Using your measurements from the helmet:
- Mark the first hole location with a diamond awl or pencil
- Measure and mark the second hole
- Continue for all mounting points
- Double-check each measurement against your helmet
This is the most important step. A shield that's off by half an inch will look wrong and may not secure properly.
If your shield already has pre-drilled holes, verify they align with your helmet's screw holes.
Fire Helmet Shield Installation: Step-by-Step Process
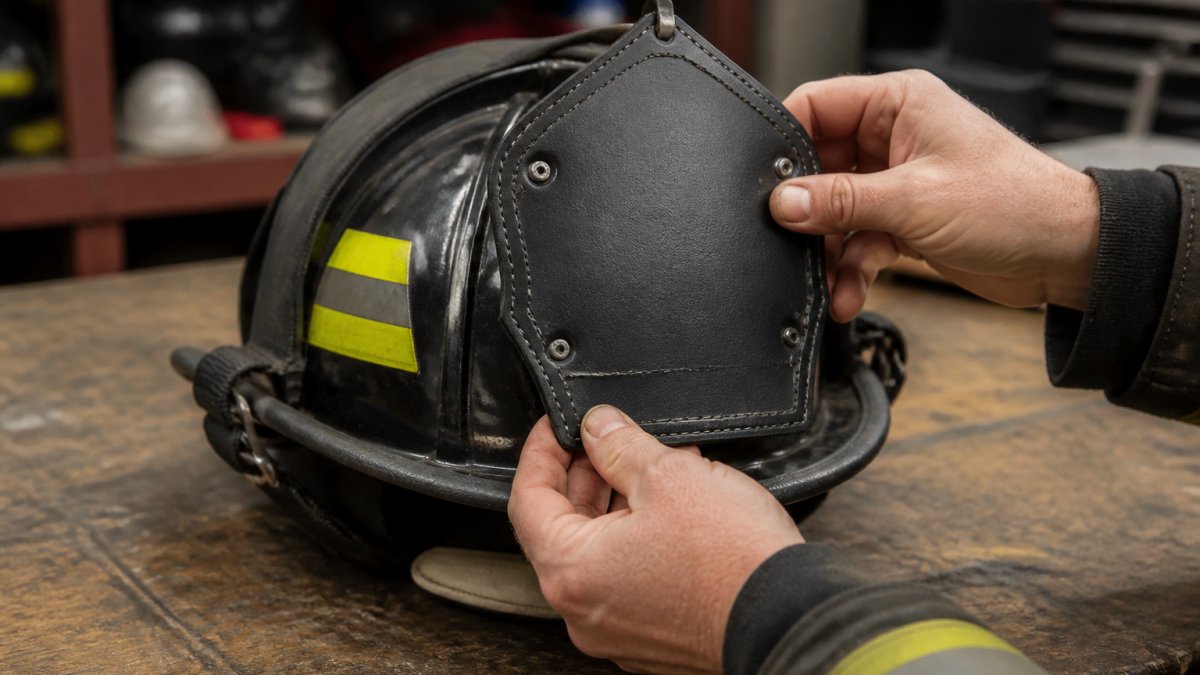
Now you attach custom leather shield to your helmet. Follow each step in order. Rushing or skipping steps causes installation failures.
Step 1: Position and align the shield on the helmet front
Place the shield on the helmet front where it will sit permanently. Center it so equal space appears on both sides.
Look at the alignment from multiple angles:
- Stand in front of the helmet and check left-right centering
- Look from above to verify the shield sits straight
- Check that the shield doesn't touch the visor or brim
- Verify the shield doesn't overlap the helmet edges
Make small adjustments until the shield looks centered and straight. Use your marked hole locations to guide positioning.
Once the shield sits correctly, hold it firmly in place. Some installers use masking tape on the back of the shield to keep it from shifting during drilling.
Step 2: Drill or punch holes through the leather
With the shield in position, use your diamond awl or drill to create holes for fasteners. If you're using rivets, punch through both the shield and the helmet hole. If you're using screws, drill carefully to avoid cracking the leather.
Carved Front Holders for Service →
For punching:
- Hold the diamond awl perpendicular to the leather
- Strike firmly with a hammer or mallet
- Punch straight through the marked point
- Work from the design side of the shield (facing out)
For drilling:
- Use a drill bit that matches your screw size
- Start slowly to prevent the leather from binding
- Drill straight through the leather into the helmet hole
- Stop when the bit breaks through the helmet
Go slowly. Leather can tear if you drill too fast. One hole at a time prevents misalignment of remaining holes.
Step 3: Install fasteners and secure the shield
Insert your fasteners one at a time. Start with the fastener that's hardest to reach. This prevents later fasteners from blocking access.
For rivets:
- Insert the rivet through the hole
- Place the rivet set on the back of the helmet
- Strike with a hammer to set the rivet permanently
- Check that the rivet head sits flush against the leather
For screws:
- Insert the screw through the shield hole
- Thread it into the helmet hole
- Tighten firmly but don't over-tighten (you can crack the leather)
- Check that the screw head sits flush
Tighten fasteners in a cross pattern. If you have four fasteners, tighten top-left, then bottom-right, then top-right, then bottom-left. This distributes pressure evenly and prevents the shield from tilting.
Step 4: Attach the rear plate or backing
Some custom shields include a rear plate or backing that reinforces the attachment points and protects the helmet interior.
The rear plate sits on the inside of the helmet behind the shield.
Align the rear plate holes with your fasteners. Insert backing fasteners from inside the helmet. Tighten them firmly so the rear plate sits flush against the helmet interior.
Fire Helmet Shield Fitment Verification and Adjustment
After installation, verify that everything is secure and properly aligned. A loose shield is dangerous and looks unprofessional.
Testing alignment and fit
Put on your helmet and look in a mirror. The shield should sit straight and centered.
Check these points:
- The shield doesn't shift when you tap it gently
- No visible gaps between the shield and helmet
- The shield sits at the same height on both sides
- All fasteners are visible and tight
Try moving the shield with your hand. It should not move at all. Any movement means fasteners are loose.
Wear the helmet for a few minutes. Make sure nothing rubs or pinches. The shield shouldn't interfere with your vision or comfort.
Troubleshooting common fitment problems
Shield tilts to one side: One fastener is loose or holes weren't aligned properly. Tighten all fasteners.
Fasteners stick out or don't sit flush: Fastener heads are too large or holes were drilled too shallow.
Leather shows cracks around fastener holes: Over-tightening caused the damage. Loosen fasteners slightly.
Shield moves when helmet is worn: Fasteners are loose. Tighten all fasteners firmly.
Common Mistakes to Avoid During Installation
Learning from others' errors saves time and protects your equipment.
Most installers make these mistakes:
- Skipping the compatibility check. Assuming your shield fits your helmet without verifying. Always check before you start.
- Using cheap fasteners. Corrosion and failure follow. Brass and stainless steel are worth the cost.
- Measuring once. Mistakes happen. Measure twice, mark once.
- Drilling in a rush. Torn leather and misaligned holes result from hurrying. Take your time.
- Over-tightening fasteners. Cracked leather and damaged threads follow. Tighten firmly but gently.
- Ignoring the rear plate. A shield without backing fails faster under stress.
Safety Inspection and Maintenance After Installation
Your shield protects your helmet. Inspect it regularly to ensure it stays secure and functional.
Monthly inspection checklist:
- All fasteners are tight (gently tap and listen for movement)
- No visible cracks or splits in the leather
- Shield sits straight and centered
- [ ]
- No corrosion or discoloration on brass hardware
- Leather shows no signs of water damage or mold
If you notice loose fasteners, tighten them immediately. If leather shows cracks, apply leather conditioner to prevent further damage.
After duty use in wet conditions, dry your helmet and shield thoroughly. Moisture weakens leather and corrodes fasteners. Proper maintenance extends the life of your custom shield to match your career.
Attaching a custom leather shield to your helmet requires precision and the right materials, but it's achievable with careful planning. Our Standard Shield and All American Brass Front Holder are designed to fit industry-standard helmets and built to last your entire career. When you install your shield correctly using quality American-made fasteners like our Brass Hardware, you get equipment you can trust when it matters most.


Frequently Asked Questions
What hardware do I need to attach a custom leather shield to my fire helmet?
Most fire helmet shield installations use brass rivets, helmet screws, or stainless steel fasteners to secure the leather to the helmet front and rear plate. The specific hardware depends on your helmet model and shield design. EH Coverings offers Brass Hardware sets with loose rivets designed for front holder and crown applications. Check your helmet manufacturer's guidance to confirm which fastener type and size your model requires before purchasing.
How do I know if a custom leather shield will fit my specific helmet model?
Verify compatibility by checking your helmet's manufacturer documentation and the shield's specifications. EH Coverings offers brass front holders designed to fit MSA, E.H. Coverings, Cairns, and Morning Pride helmets. Before ordering or installing, confirm your exact helmet model and year, measure the helmet front dimensions, and verify that the shield's mounting hole pattern matches your helmet's screw locations. Contact the shield manufacturer if you're unsure about fitment.
Do I need to drill new holes in my helmet to attach a custom leather shield?
In most cases, no. Custom leather shields are designed to use your helmet's existing mounting holes and screw locations. However, you will need to drill or punch corresponding holes through the leather shield itself to align with these points. Use a diamond awl or leather punch to create clean holes without damaging the leather. If your helmet has no existing mounting points suitable for the shield, consult your helmet manufacturer before drilling new holes, as this may affect safety ratings or warranty coverage.
How can I tell if my leather shield is securely attached after installation?
After installation, test the shield by gently pulling and twisting it at different points. There should be no movement, flexing, or separation from the helmet front. Check that all fasteners are tight and that the leather sits flush against the helmet surface without gaps. If you notice any movement or loose fasteners, tighten them immediately.